Guide to Using 'Hoseless' or Tubeless' Pole Hose Setups
- 28 Jun 2021
We sometimes get asked the question as to whether it is possible to convert Gardiner Poles to a so called ‘hoseless’ or ‘tubeless’ setup.
First of all what is this referring to? It does not actually mean that the pole is being used without hose (currently just not possible to get water to the brush head without hose!). It is referring to a system that allows the pole hose to be disconnected from the base of the pole so that the pole can be stored on its own and the pole hose can be stored separately or reeled back on to the hose reel with the reel hose. Sometimes users even use just the reel hose and this then goes up inside the pole during use.
Are there any benefits to this? The benefit that some users like is that it allows their pole to store easily in the van without a coil of hose. The other benefit, depending on hoses used, is that no connectors are left trailing on the ground in use – this only applies if using the reel hose up inside the pole.
Are there any downsides to this? The pole hose still has to be stored somewhere. If using the reel hose up inside the pole then this is a lot heavier than lightweight pole hose and can be really noticeable when working with an extended pole.
So is it possible to convert a Gardiner Pole to a ‘hoseless’ or tubeless’ setup? Yes, it is. There are several aftermarket firms offering proprietary connector systems that allow conversion of our poles. Please be careful when fitting that no alterations are made to the pole material that would adversely affect the warranty.
Is it possible to DIY convert a Gardiner Pole to a ‘hoseless’ setup? Yes, it is and several of our clients have been doing this for years and have even sent in their methods of doing so.
Possible conversion method for poles with new 'water-through' Gardiner Angle Adapters
Products needed:
- Rigid 8mm OD tube - https://www.theplasticshop.co.uk/acrylic-tube-extruded-clear-8mm-od-to-25mm-od.html
- 8mm to 8mm straight connector - https://gardinerpolesystems.co.uk/push-fit-8mm-to-8mm-straight-connector.html
- 8mm female push-fit to male Series 21 plug - https://www.bearingshopuk.co.uk/21sfrp08mpn-plugs/
Preparation:
- Remove the Quick-LoQ Water-Through angle adapter from the pole and fit the 8mm to 8mm straight connector to the base of the adapter
- On the pole you are fitting to measure from the top edge of the #1 clamp to the bottom of the end cap – let’s say this is 1490mm – this is Measurement A (needs to be very precise)
- Take Measurement A and deduct 116mm from it - this is 10mm for the push fitting on the base and 106mm for the length of the gooseneck base and the 8mm straight connector. if your pole was 1490mm then deducting this would give you 1374mm - this is now measurement B
- Take Measurement B – then cut a length of the 8mm OD rigid tube to this exact length – this will leave the male part of the plug sticking out from the end cap base by about 8mm - this can be made to be recessed or sticking out more by altering the length oft he tube being cut
Assembly:
- Push-fit the length of rigid 8mm OD tube to the 8mm connector previously fitted on the base of the angle adapter
- Push fit the male 21 plug to the other end of the rigid tube
- Remove the end cap from the pole then slide this angle adapter/tube assembly into the pole from the top and fully fit the angle adapter in position - lock the top clamp tight holding the gooseneck in position.
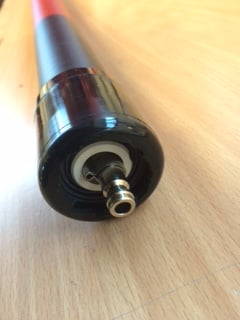
- Re-fit the end cap and the male EZ-Snap plug will just stick out by about 8mm
- Then as long as your hose length has a female EZ-Snap coupling on, it should easily connect and slide up the pole in use. This should leave just enough of the Ez-SNap female collar showing when the pole is fully closed in order to pull it off the male plug.
- Optionally you can also wrap tape around the rigid tube length at a point corresponding to just inside the base of the #1 section of the pole so that it fits more snugly inside the #1 section without being able to rattle.
The exact setup and methods above may need a little tweaking depending on your exact use and products being worked with. Please carry out your own exact measurements to confirm any dimension mentioned above prior to cutting the tube to length - the above information is presented as a guide and is not intended to be either a recommendation to use this method or a guarantee that these measurements will work for your pole set up.
If wanting to also fit a Univalve with the above set up you can insert the Univalve into the rigid tube length using the Univalve's optional quick release fittings and simply deduct the exact length of the Univalve set up minus 2x 19mm (to allow for length of tube that will slide inside the push fittings at either end) from the previously calculated Measurement B
Possible conversion methods for poles with 'old-style' Gardiner Angle Adapters
Method 1:
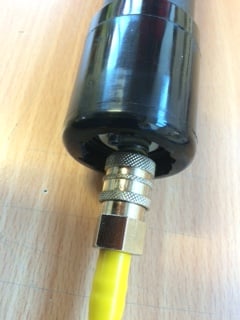
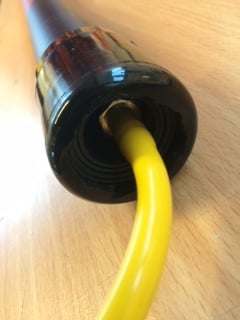
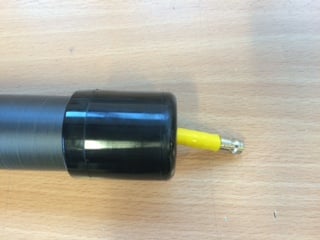
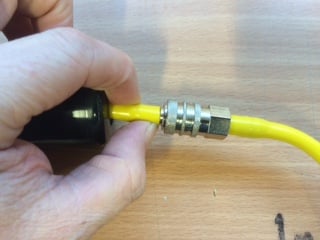
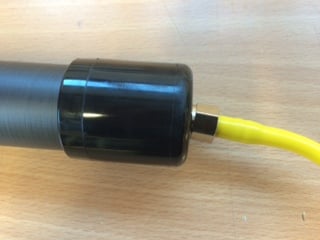
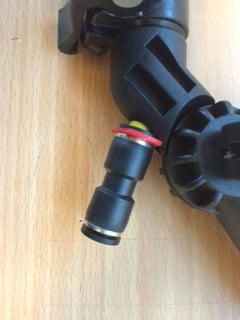
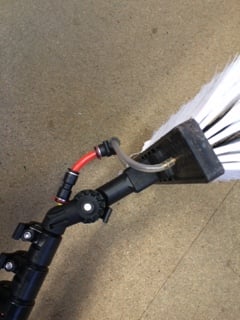
This involves leaving a short tail of pole hose sticking out of the base of the pole and then fitting a male connector such as a male EZ-Snap plug. Then the coil of pole hose that you are using can connect to the with a female coupling and the couplings and hose gets pulled up inside the pole during use. The photos below show how this looks. This is the simplest method and has been in use by some for many years.
Method 2:
This is a more complex method. It uses all standard Gardiner supplied parts, apart from cheap John Guest plumbing inserts from B&Q.
The complete kit of parts needed:
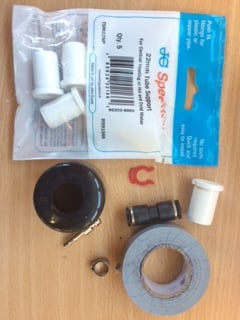
- Buy a pack of John Guest 22mm pipe inserts from B&Q - about £3 for 5
- Slide out the No.1 section from a Gardiner (or most other brands) pole
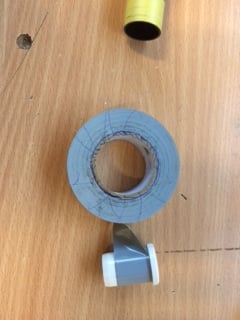
- Wrap tape around the stem of this fitting until it is a tight fit in the base of the No.1 section -

- Slide a length of pole hose (either PU or PVC) through and exit through the new fitting at the base
- Fit a Rectus male fitting to the base of the pole hose, ensuring that the clip is as close to the male fitting as possible - - Then push this tightly into the John Guest fitting as shown below:
6. Then pull the hose tight at the top of the pole and secure by fitting an 8mm straight connector and red clip
7. The connect this to the brush connector with a short length of hose as shown below
8. You can now connect the rest of your pole hose to the base of the pole as needed